Creating Pay-Ins for Crypto
Create a payment link to accept deposits to one-time, unique addresses.
This guide outlines the process for incorporating crypto payments into your embedded workflow with BVNK, leveraging the Hosted Payments Page as a user interface component for end users to complete their payments. Additionally, all information presented on the page is accessible via API response, allowing for the customization of your own payments page as desired.
Before You StartAt this point, you should have generated API keys for your EP account, established the correct authorization to make requests to BVNK, and created your EPM accounts, which are all equipped with wallets and linked Merchant IDs.
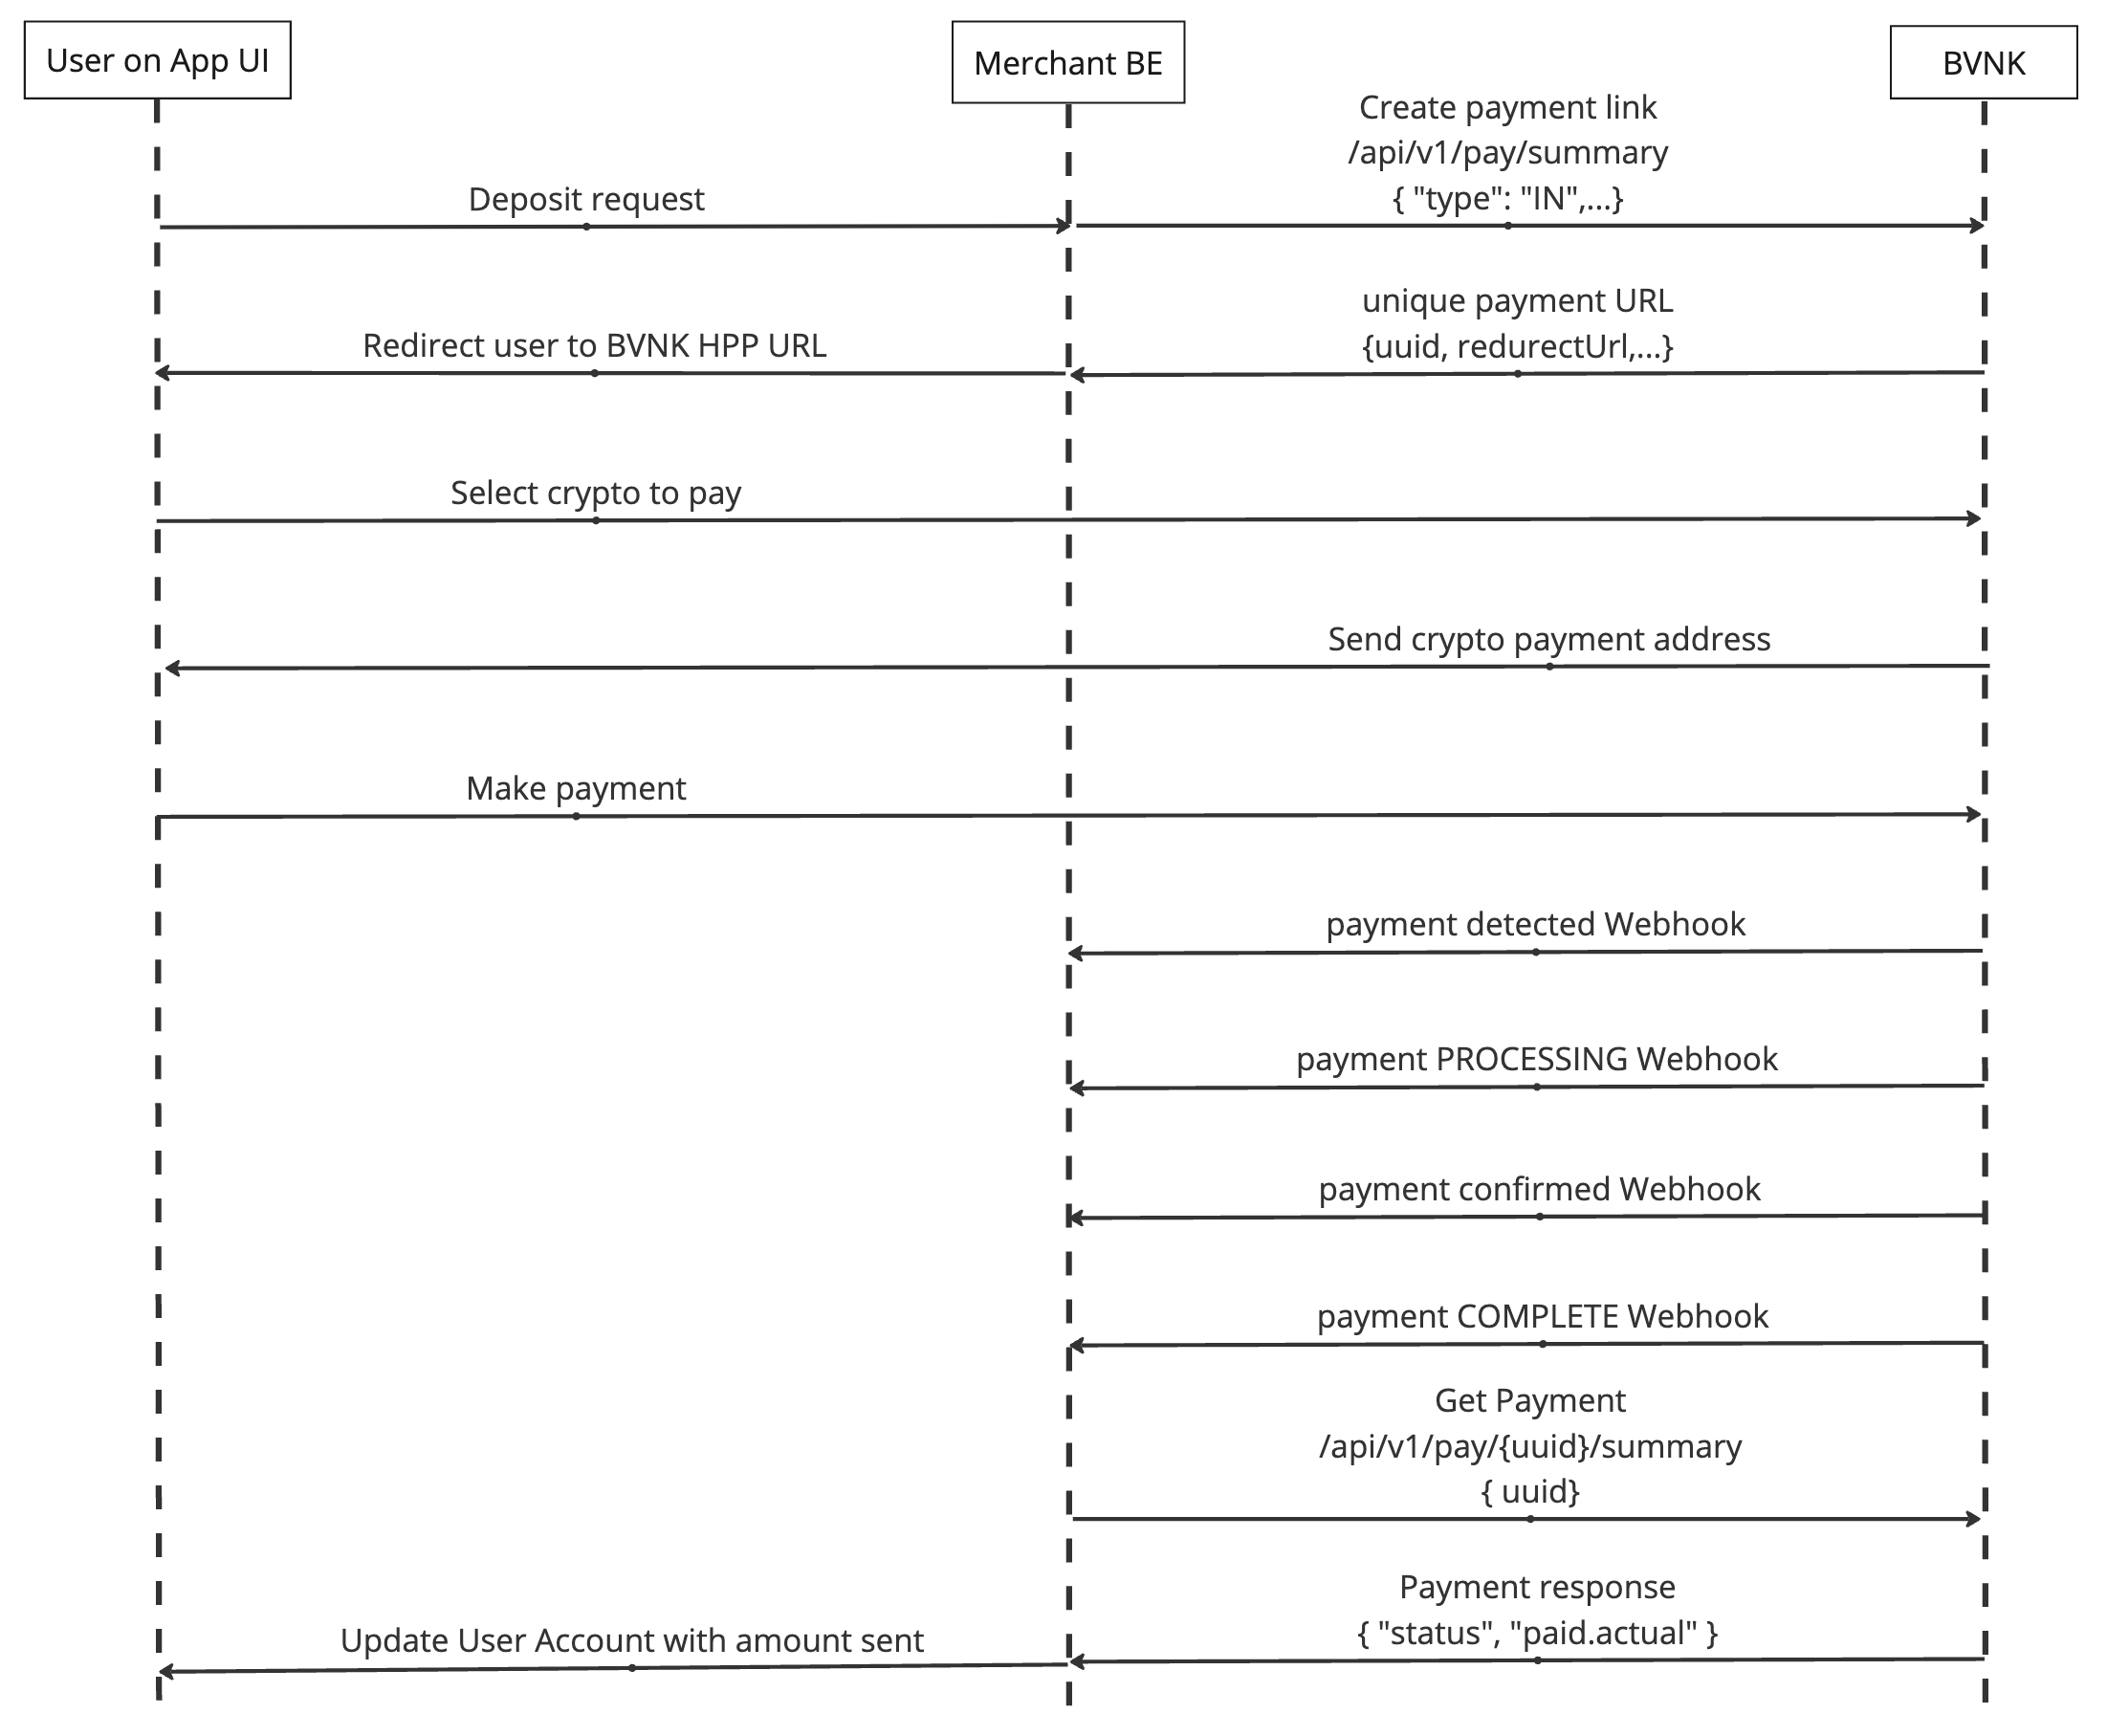
Payment In Sequence Diagram

The sequence diagram for a crypto payment in followed in this guide.
Payment Lifecycle
A payment undergoes several status changes throughout its lifecycle, detailed as follows:
Status | Immutable? | Description |
|---|---|---|
Pending | No | The initial status of your payment. It remains in this state until the payment either expires or a transaction linked to this payment is detected on the blockchain. |
Processing | No | This status indicates that the customer's payment has been detected on the blockchain. The payment remains in this state until funds are credited to your wallet. |
Complete | Yes | This status means that the funds have been received and credited to the merchant account in the chosen currency. |
Underpaid | Yes | Indicates that the funds have been received and credited to the merchant account in the chosen currency, but the amount sent by the customer was less than the requested amount. |
Expired | Yes | The payment expired before the customer sent the funds. |
Steps to Follow
This guide covers the integration of payment links into your platform to accept crypto payments, detailing the following steps:
- Initiating a payment request and handling the response.
- Guiding the end user to complete the payment.
- Setting up a webhook listener for payment notifications.
- Managing payment exceptions and errors.
Updated 9 months ago